

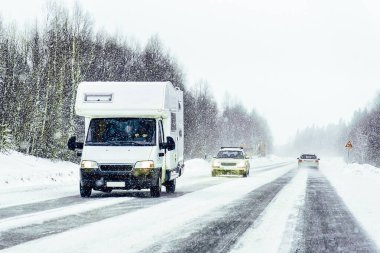
As the temperature drops, prepping your RV for winter becomes essential to prevent costly damage and keep your rig road-ready for spring. Whether you’re storing it or planning chilly adventures, a proper winterization routine protects your plumbing, seals, and exterior.
This guide will walk you through five must-do steps to get your RV winter ready and avoid surprises when the snow melts!
1. Protect Your Water System
Your RV’s water system is one of the most vulnerable areas when the temperature drops and also one of the most expensive to repair if something goes wrong.
Winterizing it properly is the first and most essential step in preventing cracked pipes, burst fittings, and damage to your water heater or fresh water tank.
Start by draining all water from your tanks, lines, and water heater. Once drained, use a winterizing pump converter kit to push non-toxic RV antifreeze through the entire system. This will ensure that there is no water left sitting in low points or joints where it could freeze and expand.
If your RV has a heater bypass, be sure to activate it so you’re not wasting antifreeze on a tank you don’t need to fill.
Taking the time to properly winterize your RV’s water system now can lead to a hassle-free start to your travels when warmer weather returns.

2. Seal the Gaps to Keep the Cold Out
Cold air loves to sneak in through tiny cracks and unsealed edges in your RV, it doesn't take much to turn your cozy rig into a freezer. Be sure to do a full inspection of your windows, doors, storage bays, and roofline to identify areas where air or moisture could get in.
Clean around each seal thoroughly with an exterior wash brush then apply a high quality sealant to any cracks or worn weather stripping.
Pay special attention to roof vents and seams around slide-outs which are common trouble spots.
By tightening up your rig and sealing all the gaps, you'll retain heat more effectively, reduce moisture buildup, and keep pests from making themselves at home during the off season.
3. Inspect and Protect Your Tires
Tires are often overlooked during winter prep, but they are a critical component to check, especially if your RV will be parked for a long period of time. Cold temperatures can cause tire pressure to drop which can lead to issues when you go to hit the road again such as:
- Flat spots
- Dry rot
- Complete tire failure
Start by checking your tire pressure and make sure that it is inflated to the recommended PSI based on your manufacturer. Under inflated tires can degrade faster and are more prone to cracking in the cold weather.
Inspect treads for uneven wear or tear as well, even if your RV will be stationary. You could also consider using tire covers for extra protection from harsh weather conditions in the winter.
If you are storing your RV, move it slightly every few weeks to help prevent flat spots or use leveling blocks or jack stands to relieve weight on tires altogether.
These simple steps can add years to your tires’ lifespan and ensure you are ready to roll safely come spring.
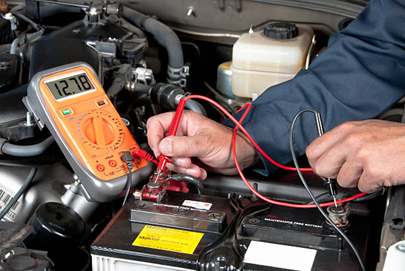
4. Protect Your RV Battery and Electrical Components
Cold weather can drain RV batteries faster than you might expect and can cause long-term damage if not stored properly.
Start by disconnecting the battery and storing it in a dry, temperature controlled environment if your RV will not be in use. Before storage, make sure it is fully charged, if a battery sits uncharged in the cold it is far more likely to freeze or fail.
It would also be smart to use a battery maintainer or trickle charger during the off season to keep it in peak condition. To help prevent rust and build up you should:
- Monitor terminals for corrosion
- Clean terminals with a wire brush
- Coat them with a battery terminal protectant
For RVs that may remain powered during winter, inspect all electrical connections and seals around hookups to prevent moisture. Also ensure that your battery disconnect switch is in working condition to cut off power when it is not needed.
By taking care of your RV’s electrical system now, you’ll avoid headaches later when you are ready to hit the road again.
5. Keep Your RV Clean to Prevent Damage
While it's tempting to leave your RV untouched during the winter, regular cleaning can make a huge difference in preserving its longevity and functionality.
Start by thoroughly cleaning both the interior and exterior of your RV.
For the exterior, focus on washing off road salts and grime from the undercarriage wheels, and lower sides. Inside, ensure the RV is dry and free of any food or organic material that could attract pests.
After cleaning, consider applying protective wax or sealants to the exterior to shield it from harsh winter weather conditions. This extra step can help prevent buildup of dirt and moisture and keep paintwork in good condition.
A little cleaning and maintenance can go a long way in preventing long-term damage, so make it part of your winterizing routine!
Ensure Your RV is Winter Ready For a Smooth Season Ahead
Winterizing your RV does not have to be overwhelming. By taking time to protect key components like your water system, exterior, battery and electrical systems, you can ensure your RV is ready for the colder months ahead.
Keeping your RV clean and sealed will also help prevent potential damage and costly repairs when you’re ready to hit the road again.
Equip yourself with the right tools and supplies to make the job easier and more efficient. Shop our catalog to help you best prepare to start winterizing your rig!

